Back up in yo ass with the fabrication

The ghoul

Forum Member
Here we go; the last project between me and getting back at the caballero.
This is the makings of my buddy's 49 ford pickup

It looks to me like some one at some time had a 49 ford missing lots of body panels and a rotted out 75 camero.
So they decided to mash them together and buy fiberglass bits.
Naturally the cab, hood, and doors are not pictured as we haven't gotten them to my place yet.
The plan is to assemble it, find out what we are missing, get the stance diled in, and make a big shopping list for my buddy to start buying.
He is already on bored with full poly suspension, full fenders, chopped, dropped, channled, rear disc conversion, engine rebuild with a more aggressive cam.
Stay tuned
 
Starting out slow on this project;
I got her sitting closer to level with a quick and dirty axle flip


I still need to fabricate an axle perch and set the pinion angle
 
turned my attention today to the bed... er... what I had of the bed that is..

since the bottoms of the panels were rotted out and since Im assuming we will end up channeling the body I decided to fabricate a new bed frame and locate it about 4" higher than the stock bed location using some 2" square tube and 1.5" angle iron.
again, the bottoms of the panels were rotted, twisted and mangled so I got a laser line on the ridge of the upper bed and measured off of that.

then I welded together the rest of the frame with the 2x2 leaving the two center cross bars floating for now, once I get a feel for how high up the rear axle will be sitting I will bolt them in; then welded in the header panel

judging by the wheel marks on the bed sides this is how I figure she sits stock (although much lower)


the fenders seem to be from a much later truck. perhapse one with a much wider bed. so much fiberglass will need to be done to make these work.
here you see the fender sitting with 4" spacer between the top of the tire and the fender


and here she sits on the ground.... I would be very happy with that stance
 
First order of busness today was fabricating a new post to replace a missing one that was on the bed side.
This is the stock one from the opposite side that I took all the measurements from to reverse engineer.

From that I started my layout with some very simple tools

I was able to use my brake for the majority of the bending

Only the top tabs remained. Those were easily done in the bench vice with a backing plate

Then the roper Whitney hand punch made quick work of the plug weld holes

And burned into place

This then gave me the two rear uprights to weld a lower cross bar into place. Once in place and because the bed was channeled about 4" there was need for a filler pan. The pan would need to be 49" long so it was beyond my brakes capasity so instead I used my modified harbor freight bead roller to make one of the 90* bends and add a structural/style bead

Once those two elements were done i formed the tabs on the side on the brake, clamped the pan in place using a section of square tube and two "c" clamps along the bed rail. Some excess was factored in so that I could hammer the pan around the bed rail and weld it into place where the welds wouldn't be visible when the deckings on...
I then welded the pan on the lower bar from the back side to assure good alignment and hammered the pan around the lower bar...
By the lower section the pan was rather beat up but with luck it won't be too noticeable once the tailgate and bumper are on...

Here you can see it from profile... Not perfect but good enough for ratrod IMO
 
Got a few spare hours this afternoon so I got back at it.
I "found" these stainless cable ends at work and realized the hole in them was about perfect for a M8x1.25 tap. So I trimmed them down length wise a bit and tapped them out

I then found a section of 1/8" wall pipe that fit around the main body snugly but would jamb up tight on the tapered section. I cut two chunks of the pipe, drilled out the original tailgate holes and welded the pipe into place as a sleeve.

I then tightened up the cable ends in place till the taper wedged them solid, and used a bit of round stock to bend and weld a master link that works as the tailgate latch.... I also found some "s" hooks that worked perfect as retainer hooks

Now all we need is a bit of chain and the hinges to make the tailgate complete

Also at work I was able to make up a new set of axle purchase and plates and also found some Allen bolts that would work wonderfully as leaf spring pins...
It really does help having access to a waterjet

I then prepped the axle for welding, and installed all of it. Once final ride height is deturmined I will set the pinion angle and weld the purches to the axle tubes

I'm currently trying to talk the owner into doing a mini tub on the rear to take advantage of the 4" of unused space between the truck bed and leaf springs (to run wider rear tires) and to run the exhaust up from behind the cab and along the bed rails like this

I think I'm losing the mini tub battle but I think he might go for the exhaust idea....
 
I took a little brake in the action And knocked together a bar roller I had been collecting pieces for for some time


I hope it is stout enough to roll re-bar
 
Then I jumped right back into the fabrication.
As you recall the axle flip didn't leave much room for spring travle

So I made up some plates out of 11ga steel (about the same thickness of the original rails

I initially was going to lap-weld them as pictured above but I didn't want them to look out of place. So I supported the back of the frame rail with a jack, cut thru the side of the rail where the plate would end, clamped a tube across the outter rail and cut away the rest of the frame rail

I then tacked the new plate in place, and since it will be a butt weld and I plan on grinding it smooth i welded in backer plates

Then as added piece of mind i welded a 1/4" steel stiffener into place


Then for the least fun part; hand bending the upper and lower rail strips with a bench vice and carefully focused brute force

I then burned those into place, removed the tube and finish welded the rail.

I got nearly completed with the project before I ran out of weld gas...

Once everything's mocked up on this truck it will get disassembled at which point the whole frame will be boxed in.
For now I am very pleased with all the room this bought me
 
Dang, I wish I would've seen this thread sooner... The easiest way to drop those is to move the spring mounts up so the bottom holes sit where the tops were and fab up a gusseted L bracket to mount the tops holes to that are now above the frame rail. You don't get the dramatic frame dragging drop but you do get quite a bit of drop if you do front and rears.

If you have any questions I have a 1951 that I will be doing soon and know a pretty good amount about the F1/F2/F3s

Nice work tho
 
turned my attention today to the bed... er... what I had of the bed that is..

since the bottoms of the panels were rotted out and since Im assuming we will end up channeling the body I decided to fabricate a new bed frame and locate it about 4" higher than the stock bed location using some 2" square tube and 1.5" angle iron.
again, the bottoms of the panels were rotted, twisted and mangled so I got a laser line on the ridge of the upper bed and measured off of that.

then I welded together the rest of the frame with the 2x2 leaving the two center cross bars floating for now, once I get a feel for how high up the rear axle will be sitting I will bolt them in; then welded in the header panel

judging by the wheel marks on the bed sides this is how I figure she sits stock (although much lower)


the fenders seem to be from a much later truck. perhapse one with a much wider bed. so much fiberglass will need to be done to make these work.
here you see the fender sitting with 4" spacer between the top of the tire and the fender


and here she sits on the ground.... I would be very happy with that stance

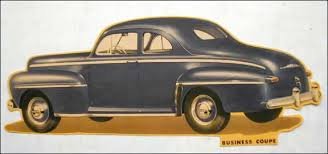
Im thinking you might have a set of late 40's passenger car rear fenders
 
Dang, I wish I would've seen this thread sooner... The easiest way to drop those is to move the spring mounts up so the bottom holes sit where the tops were and fab up a gusseted L bracket to mount the tops holes to that are now above the frame rail. You don't get the dramatic frame dragging drop but you do get quite a bit of drop if you do front and rears.

If you have any questions I have a 1951 that I will be doing soon and know a pretty good amount about the F1/F2/F3s

Nice work tho
I did take a look at that, it would have definetly been easier, but I don't think I would have gotten the anout of drop I needed.
Keep in mind the inital flip just got me level, the front will still be wearing a set of 2" drop springs so depending on the rake the owner wants we my be looking at another 2" to be taken out of the back. I think at that point I will move the mounts up (they are sitting flush with the frame as-is, and I have 3" between the rails and bed bottom to play with.)

see what I see If you graft them to the pick rear fenders You would have a cool look\
View attachment 74841
I think you are correct sir!
 
I got a little too deep into a case of beer last night so I'm taking it easy today;
I decided I was sick of trying to balance my sheet metal tools in the bench vice or slumping over using them on the floor so I knocked together a little stand that could be used for all of them.


It was only after I finished it I realized I often use my bead roller and stretcher/shrinker at the same time... Guess Ill have to make a stand specifically for the stretcher and shrinker...
It's ok because the handles kinda suck to use. I'd rather rig up a foot peddel arrangement..
 
The foot pedals on those seem really easy to fab up. Is that old fence post for the legs of the table? Awesome!

And yes, those are most certainly too narrow to be truck fenders. My rears are like a foot and a half wide
 
The foot pedals on those seem really easy to fab up. Is that old fence post for the legs of the table? Awesome!

And yes, those are most certainly too narrow to be truck fenders. My rears are like a foot and a half wide

Yeah, I put up a privacy fence last spring and kept the caps and some of the pipe. I have the bad habit of wearing sandles in the summer in the garage so I thought that was a good use for them. It also worked out very well to stabilize it..
 
Back
Top